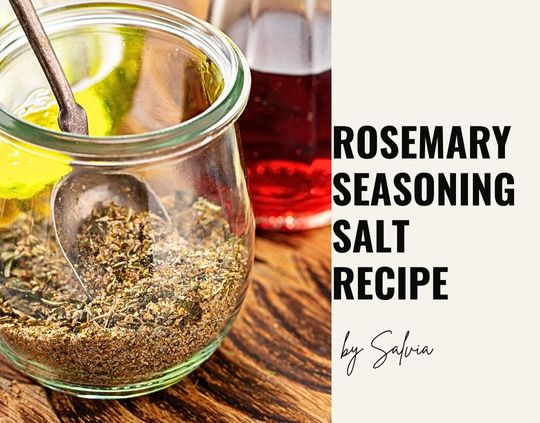
If you’re tired of plain salt on your fries and want something that’ll make them actually exciting, this homemade rosemary seasoning salt might be exactly what you need. It’s simple to make, stores for months, and works on pretty much any fried food you can think of.
The best part? Once you make a batch, it keeps in a sealed jar for ages. I’m talking months of perfectly seasoned fries, fried chicken, onion rings – whatever you’re throwing in that oil. The fine texture means it sticks well and distributes evenly, so every bite gets that herb-y, garlicky goodness with just a hint of lemon brightness.

This seasoning really shines on crispy french fries with ketchup or aioli, or sprinkled over homemade potato wedges with a cold beer. I love it on fried fish alongside some tangy tartar sauce, and it’s perfect on weekend fried chicken served with creamy coleslaw and cornbread, where the herbs complement the richness perfectly.
It’s also fantastic on fried zucchini or mushrooms as an appetizer with ranch dip, or even tossed with fried shrimp for a quick weeknight dinner with a simple salad.
Whether you’re doing frozen fries on a Tuesday night or making fresh-cut ones for the weekend, this seasoning turns something ordinary into something people actually remember. And honestly, once you start making your own blends, going back to plain salt feels pretty boring.
Rosemary salt is a fantastic seasoning for fried foods, adding a fragrant, herbaceous, and savory flavor
Ingredients
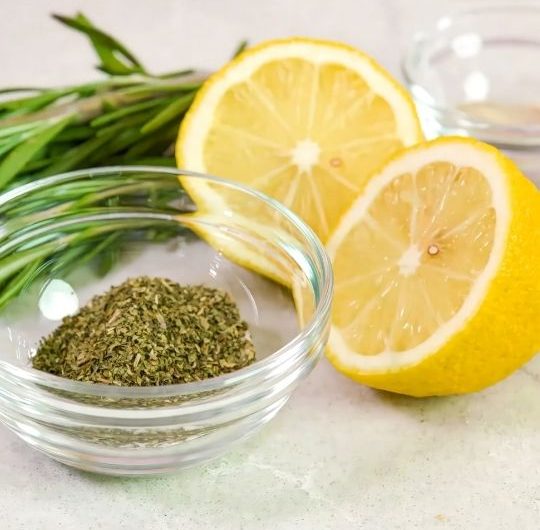
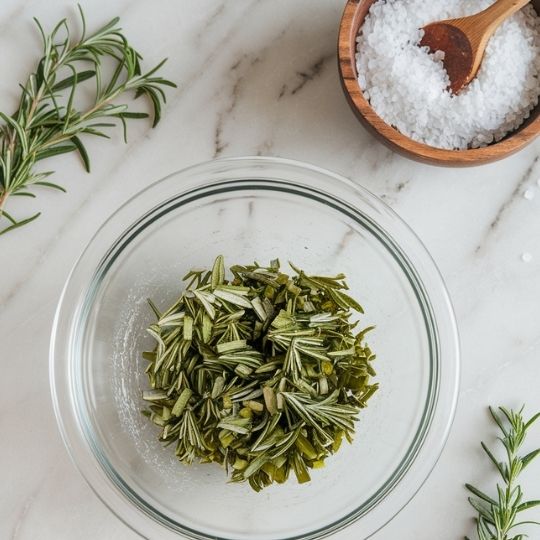
Fresh Rosemary: About 1/2 to 1 cup of packed fresh rosemary leaves (from 4-6 sprigs, depending on size).
Fresh rosemary is highly recommended for the best flavor and vibrant green color.Coarse Salt: 1 to 2 cups of coarse salt.
- Good options include:
Coarse sea salt
Kosher salt
Himalayan pink salt
- Optional Additions (for extra flavor):
1-2 teaspoons lemon zest (adds brightness)
1 teaspoon garlic powder or granules (for a savory garlic note)
1/2 teaspoon black pepper
- Equipment:
Food processor or blender
Baking sheet or large plate
Parchment paper (optional, for drying)
Airtight container for storage
Directions
- Prepare the Rosemary:
- Wash and thoroughly dry the fresh rosemary sprigs. It’s crucial for the rosemary to be completely dry to prevent the salt from clumping later.
- Carefully remove the leaves from the woody stems. Discard the stems.
- Dry the Rosemary (Important!):
- Microwave Method (Fastest):
Spread the rosemary leaves in a single layer on a paper towel-lined microwave-safe plate.
Cover with another paper towel.
Microwave on high in 20-30 second intervals, checking frequently, until the leaves are dry, brittle, and easily crumble between your fingers.
This usually takes 1-2 minutes total, depending on your microwave. Be careful not to burn it, as it can turn bitter quickly.
Oven Method:
Spread the rosemary leaves in a single layer on a baking sheet lined with parchment paper.
Place in an oven on its lowest setting (or with just the oven light on) for 2-4 hours, stirring occasionally, until completely dry.
Air Dry Method:
Spread the rosemary leaves on a baking sheet or plate and let them air dry at room temperature for 24-48 hours, or until fully dry and crumbly. This method takes the longest. - Combine and Process:
- Once the rosemary is completely dry, transfer it to a food processor or blender.
- Add the coarse salt.
- If using, add lemon zest, garlic powder, and/or black pepper.
- Pulse the food processor 8-15 times, or until the rosemary is finely chopped and well-blended with the salt. The texture should be similar to wet sand or coarse table salt. You can adjust the consistency to your preference – some like it a bit chunky for a “finishing salt.”
- Dry the Salt Mixture (Optional, but recommended for longer shelf life):
- Spread the rosemary salt mixture out in a thin, even layer on a clean baking sheet (you can line it with parchment paper).
- Allow it to air dry for a few hours at room temperature, or place it in the oven with just the light on for 1-2 hours, stirring occasionally. This helps to ensure any residual moisture from the rosemary or blending process evaporates, preventing clumping and extending shelf life.
- Store:
- Once the rosemary salt is completely dry, transfer it to an airtight container or jar.
- Store in a cool, dark place, like your pantry, for up to 6 months (though the flavor will be strongest in the first few weeks).
How I Use My Rosemary Seasoning Salt on Fried Foods
I always keep a small shaker of this blend right by my stove because timing matters with fried food.
The moment I pull something out of the oil – while it’s still sizzling and that surface is hot – that’s when I hit it with the seasoning. The heat helps everything stick and the flavors really come alive.
I learned this the hard way after letting fried chicken sit too long once. The seasoning just bounced right off the cooled surface. Now I season immediately, and it makes all the difference.
I also love it on fried chicken – it gives you that herb-crusted taste without having to plan ahead.
One thing I’ve figured out is that less is more with this blend. Since everything’s ground so fine, it spreads evenly and you get flavor in every bite. I start light – maybe a quarter teaspoon for a serving – then add more if needed. The garlic powder and black pepper give it a nice depth without being too strong.
I usually give everything a quick toss in a bowl after seasoning to make sure it’s evenly coated. Keeps the fried food crispy and makes sure everyone gets the same great flavor.
So there you have it – your own homemade rosemary seasoning salt that’ll transform any fried food into something special.
Now get out there and start frying. Your french fries, chicken, and fish are about to get a serious upgrade.


Leave a Reply