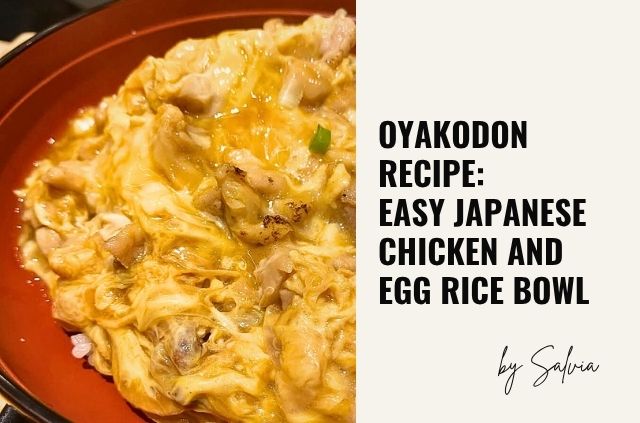
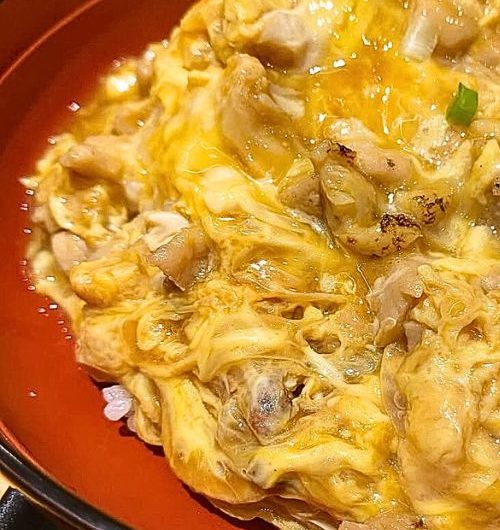
Let me introduce you to oyakodon—one of Japan’s most cherished comfort foods that I think you’re going to absolutely love. Picture this: tender chicken and sweet onions simmered in a perfectly balanced sweet-savory sauce, then topped with silky, just-set eggs that create the most wonderful creamy layer over fluffy steamed rice.
Oyakodon has captured hearts around the world because it delivers everything you want in a comfort meal—rich flavors, satisfying textures, and that cozy feeling that makes you want to curl up and savor every bite. It’s a beloved staple in Japanese households and restaurants everywhere, and once you try it, you’ll understand why families have been making this dish for generations.
Here’s what makes it even better: you can create this restaurant-quality meal in your own kitchen in less than 20 minutes. Most of the ingredients are probably sitting in your pantry right now, and the technique is wonderfully forgiving.
Trust me, whether you’re just starting to explore Japanese cooking or you’re looking for a new go-to weeknight dinner, oyakodon is that perfect recipe that’s both impressive and incredibly easy to master.
Oyakodon (Chicken and Egg Rice Bowl) Recipe
1
servings15
minutes10
minutesThis comforting and flavorful Japanese rice bowl features tender chicken and soft, custardy eggs simmered in a savory-sweet broth, served over rice
Ingredients
- For the Donburi Sauce:
1/2 cup Dashi (Japanese soup stock) OR Chicken Broth (see note below)
2 tbsp Soy Sauce
2 tbsp Mirin (sweet rice wine for cooking)
1 tbsp Sugar
Optional for Spice: 1/4 to 1/2 tsp Chili Powder (or to taste, such as Ichimi Togarashi or Gochugaru)
- For the Bowl:
1/2 boneless, skinless chicken thigh (about 4 oz / 115g), cut into 1/2-inch pieces
1/4 medium onion, thinly sliced
2 large eggs, lightly beaten (don’t overmix, you want some streaks of white and yellow)
1 serving cooked Japanese short-grain rice (about 1 cup)
Garnish (Optional): A few sprigs of mitsuba (Japanese parsley), chopped green onion, or a sprinkle of shichimi togarashi (Japanese seven-spice blend)
Directions
- Prepare Your Broth Base (Dashi or Chicken Broth):
- If using Dashi:
Katsuobushi Dashi: Bring 1 cup of water to a simmer. Add 1/4 cup katsuobushi (bonito flakes). Simmer for 30 seconds, then turn off heat and let sit for 5 minutes. Strain through a fine-mesh sieve.
Instant Dashi: Follow package instructions to make 1/2 cup dashi from instant dashi powder. - If using Chicken Broth: Use 1/2 cup of your preferred chicken broth. Opt for a low-sodium broth if possible to better control the saltiness.
- Make the Donburi Sauce:
- In a small bowl, whisk together your prepared Dashi or Chicken Broth, soy sauce, mirin, and sugar.
- For Spice: If desired, whisk in 1/4 to 1/2 teaspoon of chili powder now. Start with less and add more if you prefer a stronger kick. Set the sauce aside.
- Cook the Chicken and Onion:
- Place your small skillet over medium heat.
- Add the sliced onion to the skillet and cook for 2-3 minutes, until slightly softened and translucent.
- Add the chicken pieces to the skillet and cook until they are mostly opaque, about 3-4 minutes. They don’t need to be fully cooked through yet.
- Simmer in Sauce:
- Pour the prepared donburi sauce over the chicken and onions in the skillet. Bring the mixture to a gentle simmer.
- Simmer for 3-5 minutes, or until the chicken is cooked through and the sauce has reduced slightly. The flavors will meld beautifully.
- Add the Eggs:
- Reduce the heat to low.
- Gently pour about two-thirds of the lightly beaten eggs over the simmering chicken and sauce in a circular motion.
- Cover the skillet with a lid and cook for about 1 minute, or until the eggs are about half-set (still a bit runny on top).
- Pour the remaining one-third of the eggs over the top. Re-cover and cook for another 30 seconds to 1 minute, or until the eggs are set to your desired consistency. The eggs should still be moist and creamy, not dry or rubbery.
- Assemble the Oyakodon:
- Scoop the hot cooked Japanese short-grain rice into a large donburi bowl.
- Carefully slide the chicken and egg mixture from the skillet directly over the rice. Try to keep the egg mixture intact as you transfer it.
- Garnish and Serve:
- Garnish with mitsuba, chopped green onion, or a final sprinkle of shichimi togarashi (if you want more spice or a different flavor profile).
- Serve immediately and enjoy this comforting meal!
5 Tips for Perfect Oyakodon
1. The Secret to Creamy Eggs:
The most important thing to remember is not to overcook those eggs! You want them silky and just set, with a slightly creamy center. This creates that signature texture that makes oyakodon so comforting.
2. Why Chicken Thigh Makes a Difference:
While you can use chicken breast, boneless skinless thighs are really worth seeking out. They stay tender and juicy during cooking, and their richer flavor pairs beautifully with the sweet-savory sauce.
3. Choosing Your Broth Base:
Dashi: If you can find it, dashi gives you that authentic Japanese depth of flavor with its gentle, oceanic umami notes.
Chicken Broth: This works wonderfully as a substitute and is much easier to find. Just keep in mind that if your broth is already salted, you may want to use a little less soy sauce in your mixture.
4. Spice Options for Heat:
Traditional Japanese cooks might reach for Ichimi Togarashi (pure ground chili) or Shichimi Togarashi (a lovely seven-spice blend).
But don’t worry if you can’t find these—regular cayenne pepper or even Korean gochugaru will add that perfect touch of warmth.
5. Taste as You Go:
Before you start cooking, give your sauce mixture a quick taste. Everyone’s palate is different, so feel free to add a bit more sugar for sweetness or soy sauce for saltiness until it tastes just right to you.
That’s All for the Recipe!
Now it’s time to get cooking! I hope you enjoy making this comforting oyakodon—there’s something so satisfying about watching those eggs gently set over the savory chicken.
I’d love to hear how it turns out! Feel free to share your cooking adventure, any tweaks you made, or how you liked the final result.
Happy cooking! 🍳


Leave a Reply